To Pick or Not To Pick, That is the Question: a mini-course in harvesting
Depending on where, when, and what you planted, you are probably in the thick of, or rapidly approaching, harvest time. But how do you know whether to pick or not to pick? This is a question I have been asked A LOT. Not all plants clue us in by turning bright red like tomatoes! To set you up for harvesting success, I created a…
3 part harvesting mini-course- just for you!
There are a few factors involved in when to harvest, so today, let’s look at the general basics.
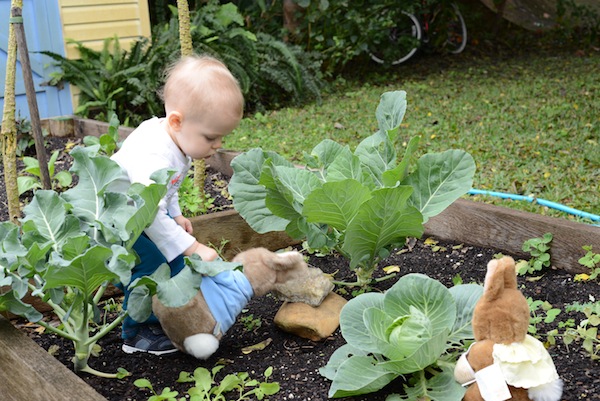
Start to harvest your greens when they are about the size of an 1 year old!
Time: The time frames on the seed packets will give you a general idea of when to harvest. Be sure to document on the calendar when you planted so you can mark the appropriate number of days till harvest. This is a great activity to do with elementary age children for calendar and time practice.
Color: The color of the fruit or veggie to be harvested is the first indicator. Is it the color that the seed or start pack advertised? If you are harvesting tomatoes, they could be a wide variety of colors from Green Zebra heirlooms that stay green when ripe, to the garden center favorite Better Boys which turn the classic bright red. Know what variety you planted and when they turn the right color pick em!
Size: This is also a good quick indicator. Know what kind of varieties you are planting and then pick according to the size advertised on the packet or label. Do you remember which tomato plants are cherry tomatoes and which are not? Did you plant regular or ichiban eggplant? Be sure you know what your mature fruit should look like to help know when to pick.
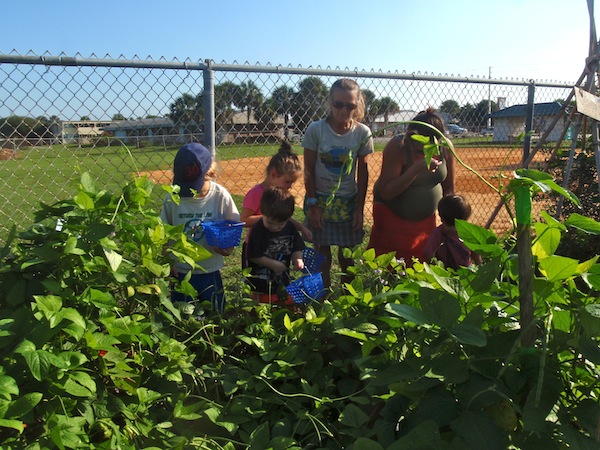
These beans are ready! They are taking over the garden!
Now, let’s go a little deeper into some specifics.
Beans and peas for shelling– You can’t see inside their shells to know if they are ripe, so how do you know when to pick? Watch the pod color. On the center line of the pod you will see literally a seam. For legumes like black eyed peas and butter beans that you will be shelling, when this seam becomes yellow, pick the pod. This is when the beans are the plumpest and freshest. Also, look at and feel the pod. Can you clearly see and feel the beans bulging? This is a good sign to pick. If the pod feels tight and smooth, more like a green bean, the beans inside are not ready.
It is fine to pick the beans beyond this yellow seam stage, even to the point when their shells become dry, loose, and papery, but try to avoid picking them when the pods are still deep green because they will be hard to shell and the beans will not have reached maturity. It is inevitable that you will miss some pods, so when you find them dried, pick them and store the dried beans separately for later soaking and cooking. Do be sure the beans are very dry before your store them. (More to come on storing in part 3!)
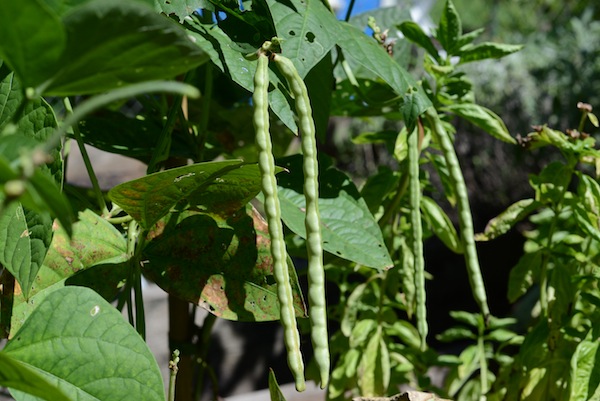
These beans are about ready, bulging, and the seam down the right side is starting to yellow at the bottom.
Green beans and snow peas– These are the type of legumes that you eat the pods, so you want them fresh and tender. Explore all in the vines and bushes to find all the pods that are hiding! There will be so many pods to pick! Look at the length and plumpness of each pod compared to the others on the plant. You will notice many stages of pods. This will give you a good idea of its harvest readiness. Pea pods are thin and crisp and green bean are plump and crisp.
Green beans are pretty forgiving if they get large you can still eat them, but many pea pods will become stringy if they get too large, so be sure to pick pea pods when they are not too much more than a couple inches long.
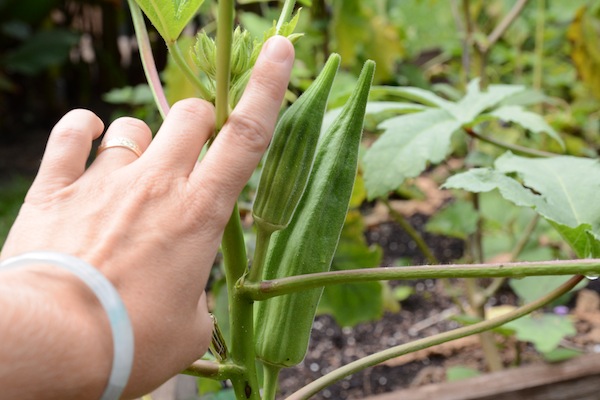
Pick you okra when they are about this size of your finger. The right one is getting too big.
Okra– This one is opposite. The smaller they are the better. When okra get very large they are too woody to eat so be sure to be a vigilant okra harvester once they start coming in. Ideal okra picking size is 1.5-3 inches. They can grow really fast so if you see an okra that is almost ready to pick but a little small be sure to get out there and pick it the very next day. It seems like they sometimes grow 2 inches overnight!
Melons– This is an important family to really know the days until harvest form the seed pack. Watch for color, size as in diameter, and plumpness. Even with melons that stay green on the outside, you will notice a change in the green hues. Less ripe green melons are a darker green and fade to a lighter brighter green as they ripen. (More on melons in Part 2 because they get tricky with water quantities.)
Cucumbers– These cucurbits can get bitter when they get too large and the peel starts to yellow, so be sure to pick them when they are plump and bright green. In my experience, they may never reach the size indicated on the packet, but they will look nice and fresh and plump so keep and eye on their skin and girth and you should be fine. You know a cuke is really fresh when it still has the little spikes on the peel. Notice them on the ones you harvest form your garden. I love to pick them off! With these I’d say better to pick a little early than too late.

Super psyched on their sweet potato harvest!
Sweet potatoes and yams– Even though they are underground these are easy because you know they are ready when their leaves begin to yellow. Thank you sweet potatoes for the easy sign!
Root veggies like radishes, beets, and carrots– You know it’s time to pull them up because often you will see the top of the veggie bulging up out of the soil. This isn’t always the case, so feel free to dig around the base of the leaves and feel for a bulge. The days until harvest will give you a general idea of when to start “rooting” around! (I’m so cheezy!!)
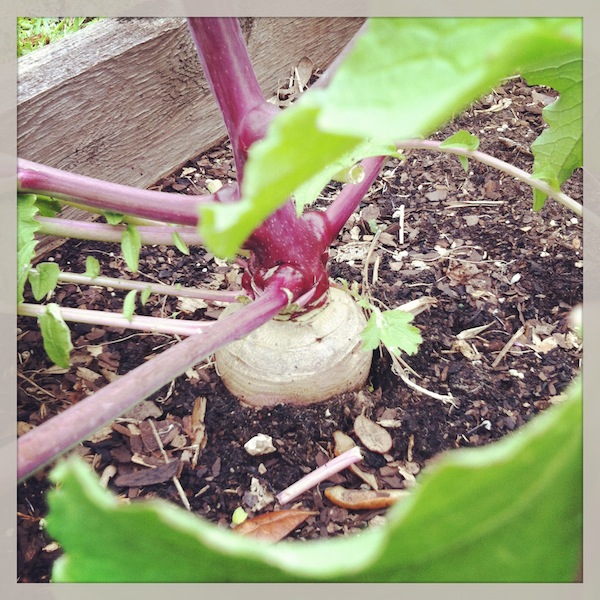
This is an exaggerated example to prove the point. See the root bulging, but this is a radish and should have been picked months earlier! A beet like this would be perfect!
Peppers– Many people don’t realize that green peppers are just unripe peppers. I suspect this may be why they make many people’s stomachs hurt. So if you like green peppers, hot or sweet, pick them green. If you want ripe peppers, wait until they turn red, yellow, orange, purple, or whatever other rainbow variety you planted!
Brassicas (Greens, brussel sprouts, and broccoli)– First, all the flowers of the brassica family are edible so feel free to sample them as your plants finish up and go to seed. They taste like broccoli and honey and look great in salads! Greens are easy to harvest because they can be picked as needed, just be sure not to pick the very innermost leaves so the plant will keep growing. (This goes for lettuce too, but lettuce is not a brassica.)
With broccoli, pick when the main center head looks big and plump and the little florets are not tight. as the plant matures these florets will loosen and eventually open up into actual flowers. If you miss a head and it gets really loose or goes to flower, never fear, you can still eat it just fine! Once you pick the main head of a broccoli plant leave the plant growing and it will continue to produce smaller heads for months. These of shoots are what they sell at the store as broccolini.
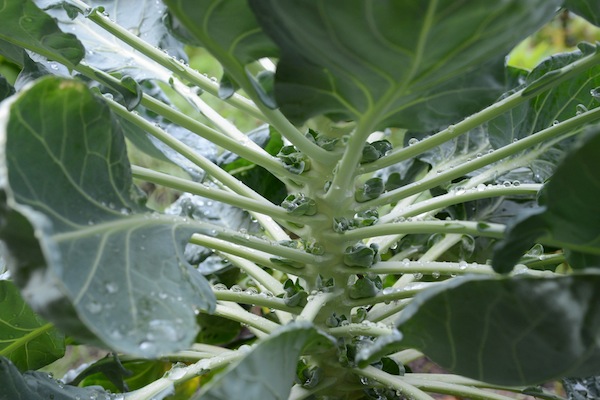
 See the little brussel sprouts growing between the leaf and stalk
Harvest your brussel sprouts when they looks plump like little cabbages on the stalk and the very outer leaves start to loosen a bit. These little heads will be hiding in the armpits of the larger leaves and main stalk. Pick the heads as needed ro you can harvest the entire plant for a big meal. The main leaves of the brussel sprout plant (as well as the broccoli plant) can be eaten the same as you would prepare collards or cabbage.
Okay, so you are now set up for general harvesting success. Thursday I will cover some of the more advanced harvesting considerations such as inclement weather, predators, fungus, and I’ll even get a little woo-woo on you and talk about intuition. Then next Tuesday, we’ll talk about some storing basics for your garden bounty!
Want a a harvest tip for a veggie I didn’t cover? Ask in the comments below!
Share your harvest pics on Instagram #wingswormsandwonder
Seeds to Sprout:
Be sure you are signed up for the Wings, Worms, and Wonder newsletter before Wednesday (tomorrow) to get the upcoming secret subscriber freebie and discount info on the soon to be released Nature Journal Prompt Cards!
The Farmer’s Almanac has lots of free info on specific veggies. Just type in your veggie or fruit in question into the search. I got you started here with beans.
Johnny’s Seeds has interactive planting calendars that can help you track when you planted so you know when to harvest.

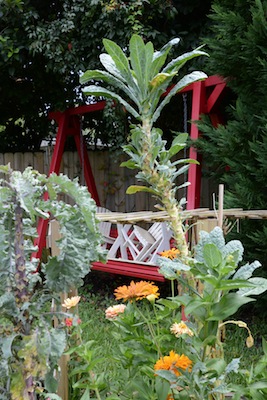
When you stick to picking the outer leaves of the greens, after a season they will be very tall and interesting looking like this kale plant. It is about 5 feet tall!