Wonder Wednesday 92: 4 Step Flower Pot
It’s a double activity month! Since so many of us are staying home, I thought hey, I’ll share some of the things I’ve been doing to stay creatively engaged with nature with 2 activities this month- and flowers are a big part of that! Plus, it’s kids gardening month, so this activity fits great with that too.
During this time of physical distancing, I haven’t been at my regular house. I’ve been in the mountains which is great. I haven’t been up here in spring in decades and that was in a time before I knew much about all the wildflowers in the area. I’m learning so much which always makes me feel good.
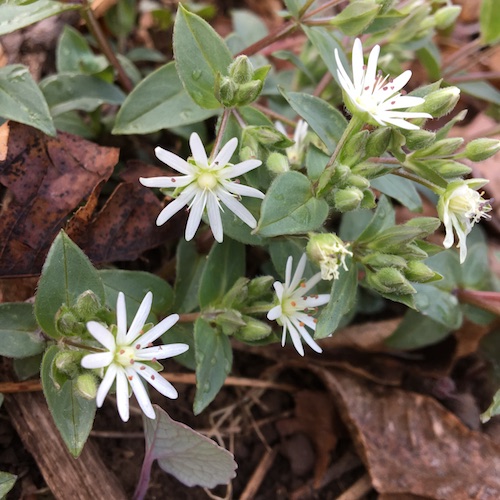
This is a new (to me) kind of chickweed that grows up here in the mountains!
It has been a real joy to get to know these native plants in their wild, many medicinal, during the past month. But learning more about these herbs and wildflowers also made me miss food gardening, so for the past month I’ve been growing a small patio tabletop potted garden.
Honestly, the past year I’d gotten a bit burned out year round food gardening in the relentless Florida climate of heat, drought, bugs, hurricanes, and everything else trying to constantly kill anything you try to grow. So, this small (but growing) container garden has been a breath of fresh low pressure gardening air for me.
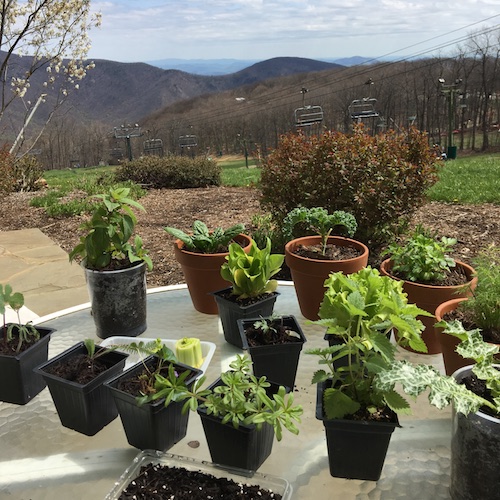
Some of these starts I got from a local farm at the locally owned health food store. Some I’m regrowing from our own produce scraps. But others, I’ve responsibly wildcrafted. In the correct spirit of wildflowers and wildcrafting, I only take plants I can 100% positively ID and know are not anywhere near endangered.
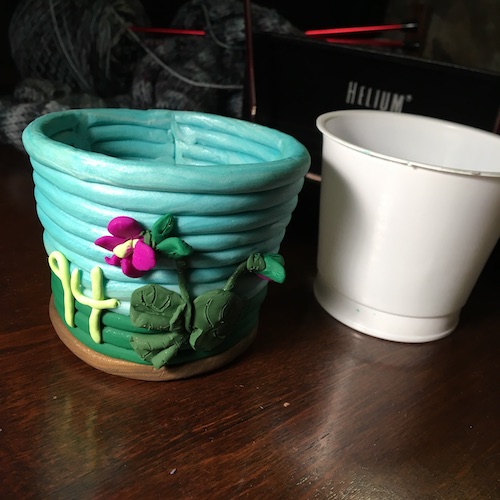
As you see, I only had access to 4 clay pots, so I’ve been making due – and that’s in part how this activity idea came to me! The other part of the story is this week is my grandmother’s 94 birthday and getting her a gift was going to be a bit of a challenge this year.
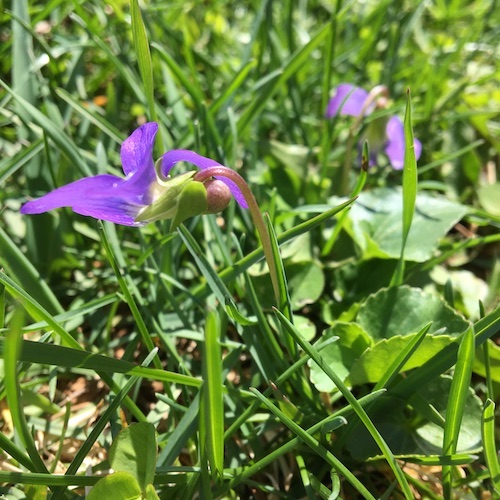
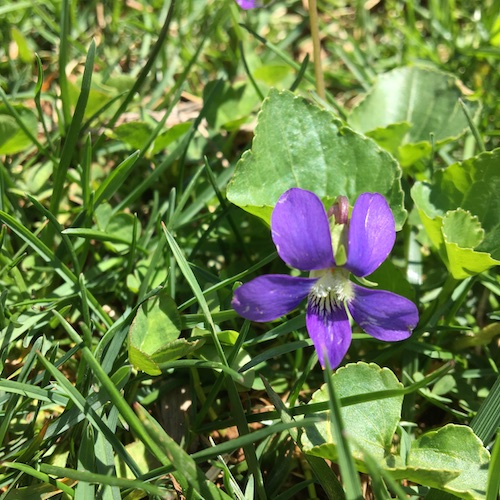
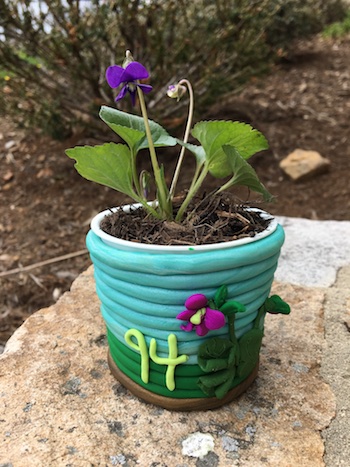
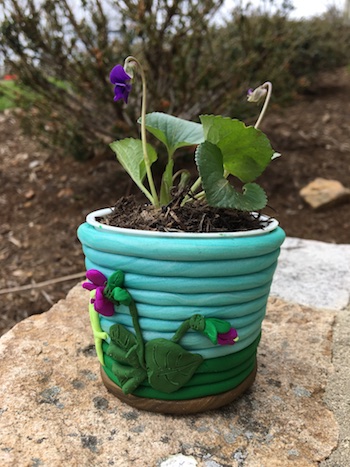
So I thought, I’ll plant her a little wildcrafted violet plant to keep her company in the distancing!
But then I thought, well it’s not going to look very festive just in a yogurt container.
That’s when I remembered I had some oven bake type clay I could use to make a sleeve to dress up the container! Voila!
Wonder Wednesday 92:
4 Step Flower Pot
Making a pot sleeve is fun because you can swap it out seasonally or for special occasions (like birthdays) to make your little plant part of your year round decor. Up-cycling doesn’t have to look junky or like trash gardening. With a simple fun project like this you can reduce, reuse, and look good!
If you don’t have access to wildcrafting plants, no worries, just use a regrown plant like a carrot top or celery bottom or sprout a seed from a lemon or dried bean.
I made a super quick 2 minute video of the potting process here, and the full instructions are below.
Supplies:
2 up-cycled plastic containers – that nest. (I used small oat yogurt cups of the same brand, but plastic cup type container of any size that you can poke holes into the bottom of works just fine.)
Drill or something sharp to poke drainage holes into the bottom of 1 cup.
A wildcrafted plant (see below for link to responsible wildcrafting). Or a regrown plant or sprout. (Learn to regrow veggies of all sorts in my book Wonder & Wander or for a quick lesson check the blog link below in Seeds to Sprout!)
Potting soil
Oven bake clay of any brand, or waterproof kids air dry craft clay
A toothpick or fork
Optional – plastic wrap
Preparation
In only one of the containers, poke or drill 4 drainage holes into the bottom.
Take a walk into nature accessible to you. Find a small wild plant that you can identify. A simple common “weed” like a violet, dandelion, or a buttercup works great. Carefully, trying not to disturb the roots and keeping the soil surrounding the roots as in tact as possible, dig the plant up and bring it home.
If you are sprouting a seed or regrowing a veggie, still take a walk in some nature, if you can.
If that’s not an option, take a virtual walk through the nature photo slide show in the Wonder Wednesday 91 activity (link below in Seeds to Sprout) or a nature book.
Procedure
Once you have a plant and an up-cycled pot with drainage holes, fill the pot partially with soil and plant your plant. Fill in additional soil as needed. Water and set aside in a sunny spot.
Let’s make the pot cover sleeve!
Get the second up-cycled pot, without holes. Use this as your sleeve form. I recommend placing plastic wrap around the pot to more easily remove the clay form off when it’s time to bake or dry the clay.
With the clay, create a coil pot – with no bottom. No bottom is key. Think coffee cup sleeve style.
Craft a coil pot by making “snakes” of clay in whatever colors and patterns you like.
Wrap them around the up-cycled pot form.
With a toothpick or fork, slightly rough up the area where the 2 snakes meet so you get a good strong hold when you press the “snakes” together. In pottery this is called scoring.
Press each snake into the previous snake to make sure they stick together securely. Continue this process up the height of the pot.
Once you have a sleeve of secure coils covering the pot, add any additional decoration. On mine, I added little violets to match the plant growing inside and a 94 since it was a birthday gift. If adding decorations, remember to score the backside of each item before pressing into the coil pot.
Very carefully, remove the up-cycled form pot from the clay sleeve. Make any slight adjustments needed to fix the shape once the coil pot is off the form.
Bake or air dry according to package instructions.
Once the clay sleeve is set…
Place the up-cycled pot with no holes into the sleeve.
Now, nest the potted plant into that empty no holes up-cycled cup inside the clay sleeve.
Why 2 nested cups?
The 2 cups provide space for drainage from the potted plant and protect the surface the pot sits upon.
When the plant is watered, let the water drain into the no holes bottom pot for an hour or so. Then, slide the plant pot out of the nested pot, pour out the drained off water, dry the cup, and nest the plant pot back in.
The nested cups nested also makes it easy to swap out the sleeves if you make multiple designs for a single plant without disrupting the actual potted plant.
Extensions:
Make a nature journal to document observations of and research about the wildcrafted plant.
Learn the botanical name, the natural habitat, physical needs, and ethnobotany of your plant.
If your plant is also an edible herb or flower, once it is established in its new pot (you can tell because it looks healthy and has substantial new growth) harvest a bit and make some tea or add it to a salad!
Disclaimer: I know you know this, but NEVER eat wild food or touch unfamiliar plants unless you can properly identify it yourself or are with an expert guide.
What is your favorite early spring wildflower or weed to pop up?
Share in the comments below!
Share pics of your pot sleeves on Instagram #wingswormsandwonder
Seeds to Sprout
Click here for Information on safe, responsible, and ethical wildcrafting and foraging.
Click here for tips on wildcrafting with kids
Disclaimer: I know you know this, but NEVER eat wild food or touch unfamiliar plants unless you can properly identify it yourself or are with an expert guide.
Comments are closed.
Aw, you’re so cute in the mountains making a mini garden. My mini garden is soon to be outdoors, now growing in ugly milk containers in the window until it’s warm enough outside here in Sweden.
My favorite spring flower is… the first one I spot. I always fall in love with it, what ever kind it is…
I move mine out in the sunny part of the day and ring them in at night for the cold… and the critters! They would love to have a midnight snack on these little sprouts! I raided my recycle bin for more pots yesterday too. The little garden is growing in all directions 🙂 Hahaha! Me too! It’s so tough to choose just one favorite flower – I’d say whichever one I’m closest to at the moment!